Friday, September 21, 2012
On a Whim
Friday, December 2, 2011
Before and After-The Built In Bookcases
Friday, October 7, 2011
Fireplace Makeover
I'm glad I took the risk and painted the brick and moulding. Next up, the built-in bookcases. Do I dare? I'm still pondering this one. The other end of this room is our kitchen, which is a dark cherry. I would love to paint the bookcases a dark grey, but would I completely ruin them? Would I turn into the dreaded "former homeowner" if we ever sold this house? And, while I'm questioning myself, why did I not tighten those slipcover seats before I took these photos?
If you want to see how I distressed the mantle, click here.
I'm linking with Miss Mustard Seed.
Have a Great Weekend everyone!
Monday, September 19, 2011
Office Chandelier Makeover
Tuesday, September 6, 2011
Home Office Closet - Before and In Progress
Monday, October 25, 2010
Dining Buffet Before and After
Here's the before - it was functional, and I hate to throw away good furniture....
I never intended to paint it this blue color. I was going for grey, but I had a quart of blue I was sampling out several years ago. I am glad I went with it; it goes nicely with my painting. Plus, I was able to get rid of one more can of paint that is taking up space in our basement!
As I write this, the wind is BLOWING hard outside. Today is trash day, and there is trash all over the street! I am so glad I got some of these painting projects done this summer. It may be a long Winter.....
Wednesday, September 15, 2010
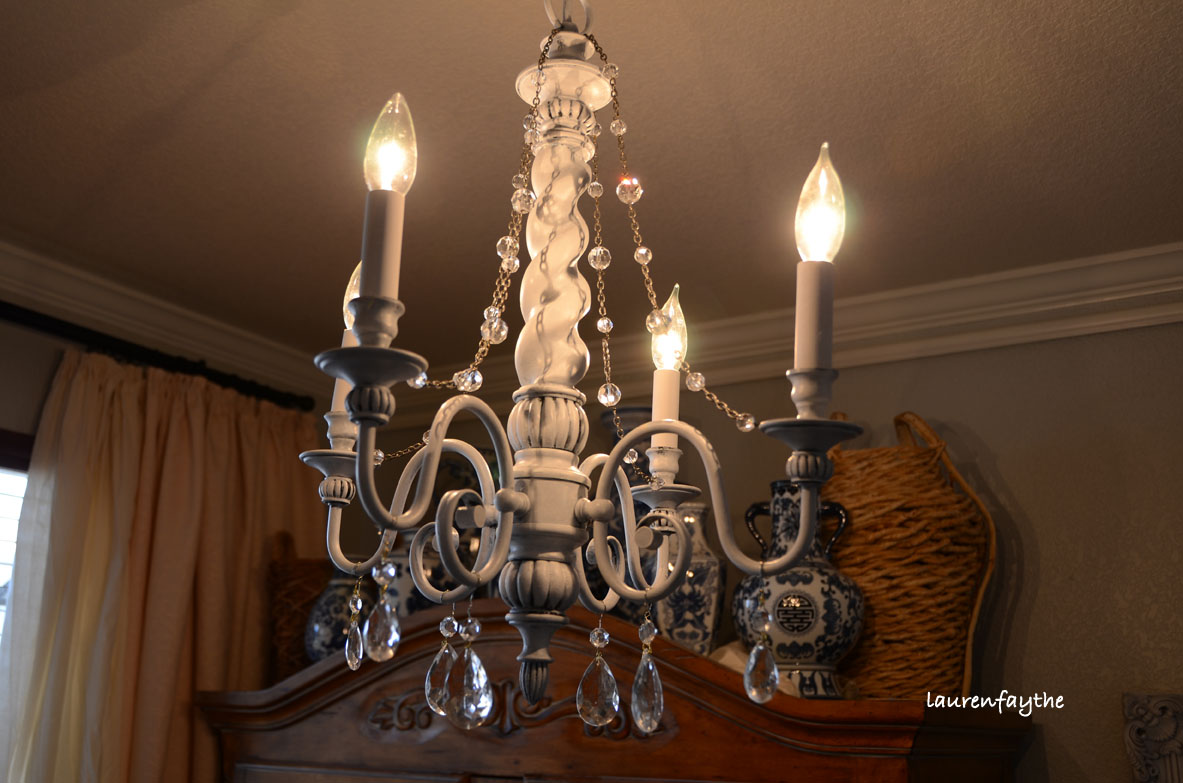
My Chandelier Makeover

Hello Everyone! Hope you all are having a great Wednesday! I just wanted to share with you a makeover I did on my chandelier a few weeks ago.
The chandelier that came with the house was a brownish chandelier that had a hint of purple. Here is a before picture:
For several years, I tried to disguise with a lot of crystals that I gently hung, and some crystal-look garland (sorry for the blurry pic, I couldn’t find a good before shot):
I decided to finally take the whole thing down and paint it like it needed, and get some holes drilled into it so that the crystals would stop flying off whenever I needed to change a light bulb!
Using a titanium drill bit, I had my husband drill some holes. It was easier to cover where the holes needed to be drilled with some blue painter’s tape:
Then I spray primed it, and painted it black. The picture below shows the primer. I already had this primer from a previous project.
I then had my husband hang the chandelier in the dining room because I had no real plan of what beads to use, and I didn’t want a lightless dining room.
I had a bunch of beads I purchase a few weeks prior to this project that were half-off at Michaels.These are large jewelry beads. I also had some pre-strung crystal that I purchased about 4 years or so ago. :
I sat at the dining table using some jewelry wire, tested out some combinations. I wanted to bring out some of the colors in the current painting I have hanging in the dining room. I finally came up with a combination that I liked, and strung it, and came up with this:
(See how I started decorating for the Fall with my dried orange Chinese lanterns above?)
For a bit of whimsy, I switched out the light bulbs from the “flame” shape to the round shape.
The best thing about this project is that I can easily switch out the beads to coordinate with any changes I make with the room!
Wednesday, August 25, 2010
How I Did The Mantle Re-do
In my previous post of my mantle re-do, I showed you the before and after. Now, I’m going to attempt to explain how I achieved that chippy look. Whenever I painted furniture, I always used the sanding method to distress the piece, but for the mantle I wanted more of a chipped paint look. By trial and error, this is how I accomplished it. I’m SURE there is a better way that professionals do it, but this is how I did it.
Here was the before:
First, I taped off the mantle to protect the brick, then I used a tinted primer left over from another project. This is the primer I used, and I’ve been happy with it with my other projects. It claims that you don’t need to sand the piece, so I didn’t.
Here it is primed:
After that dried, (maybe an hour?), I randomly painted with leftover paint samples from Sherwin Williams. The darker color was Seal Skin, and the grey is a mixture of Seal Skin with other leftover paint. It was a beige color. These were the colors that would show when the paint “chipped” off.
After that dried, I painted with more leftover paint, Benjamin Moore Linen White in an Eggshell finish. I think it was important that it was not in a flat finish. Flat dries too quickly. As the Linen White was drying, I started taking off the paint. I didn’t wait until it was completely dry, because it is harder to peel the paint off that way. I didn’t put all the coats on before I started peeling either. I alternated peeling, and recoating the unpeeled parts, if that makes sense. By the way, I used a bristle brush on the edges, and a sponge roller on top. the brush allows for more paint to be applied at the same time. Towards the end, I lightly used a sponge brush.
Here I am trying to get that paint off. I used my finger nails, a trowel, a screwdriver, and whatever I could find. You can see brush marks in this picture, but we can get rid of that later.
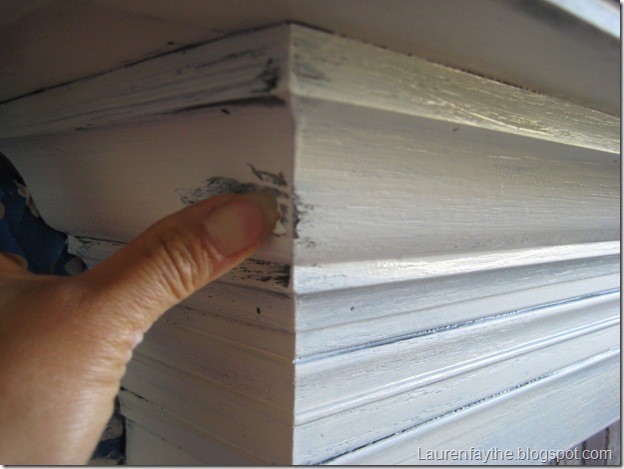
I used my embossing heat gun (a heat gun used to make embossed cards) to heat the paint to scrape off if the paint was too dry, and also to achieve that bubbling effect. When I used the heat gun, I made sure to use the trowel (and not my fingernail) to scrape off the paint, as the heat gun heated up the mantle quite a bit.
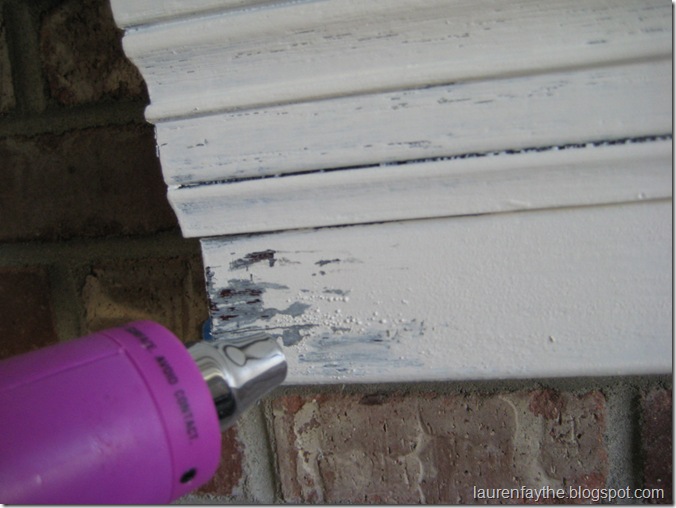
I live in Colorado, and with the dry air, the paint was drying too quickly, so I would continue to paint on top of where I wanted chipping, because it loosens up the under layers.
So, I kept going at this process until I got what I wanted. I also sanded in a few spots to get down to the original color of the mantle, but not much. I then went over lightly with a very fine sand paper over the areas where I didn’t want to see the brush marks. In the end, I found the mantle was too white to look like it was an old piece. (Sorry I forgot to take a picture of the white chipped mantle.) I “dirtied” it up a bit by rubbing a gel stain (found in the paint dept.) on top in a Walnut finish, they wipe it off quickly.
I did not distress the top of the mantle, as I didn’t want too bumpy of a surface for all those revolving accessories. Plus, I’m too short to see the top of the mantle, and I’m the only one that notices these things around here. :) I did, however, rub on that gel stain and wiped it off.
Here is the final piece:
I may end up going back to distress and remove some more paint later, we’ll see. I also may “crackle” it in a few spots as well. For now I will live with it.I hope I was able to explain my steps. If not, please feel free to ask questions.
Sunday, August 22, 2010
My Fireplace Mantel Makeover

It’s been a long time since I’ve participated in Between Naps on the Porch’s Metamorphosis Monday. Welcome if you are visiting!
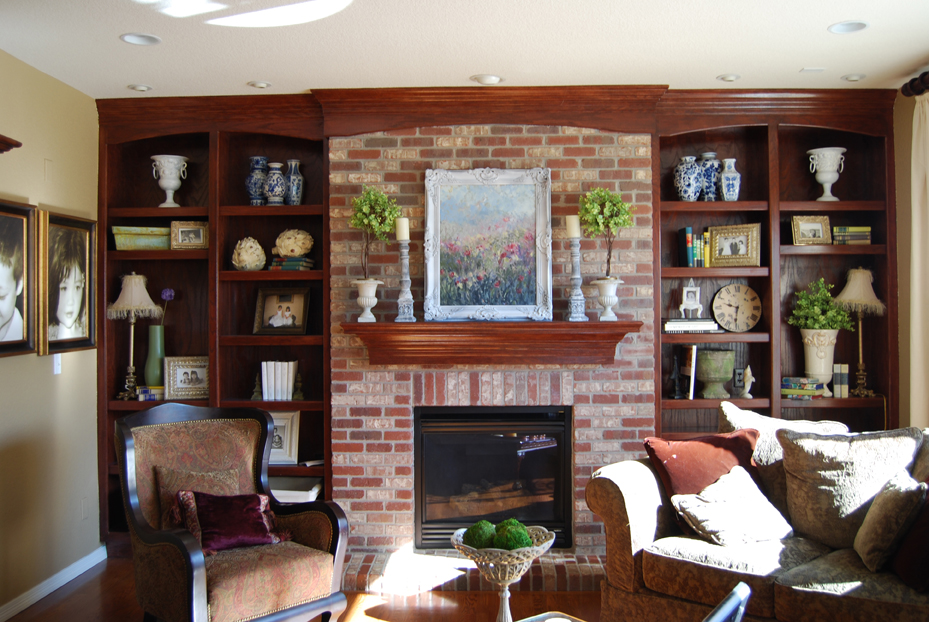
This is a post on my fireplace mantle re-do. The mantel in my family has annoyed me for a long time. It had no character. It didn’t do anything for my revolving artwork and accessories. No pizzaz. The finish on the whole wall of bookcases(not shown) and the mantle were a reddish-brown stain, and the wood is oak. I’m not a huge fan of oak. The opposite side of this fireplace is our kitchen, in a dark cherrywood.
I debated a long time of whether or not to paint the mantle, bookcases, or both. Resale value of our home was the biggest factor, as people around here still prefer wood (even oak). Well, we’ve come to the conclusion that we’re not moving anytime soon as we are pretty settled in our neighborhood. So, testing the waters, I mentioned to my husband that the whole wall of built-ins and mantle were not doing anything for me. He agreed that it was looking dated, and that I could paint everything if I wanted… I love my husband….he has no fear of paint. :)
I decided to start with the mantle first. This was my inspiration:
Ledge from Pottery Barn
Here is a before of the mantle:
After much distressing, and layering of colors to achieve a worn, chippy look, here are the after pics:
I know this isn’t the look for everyone, but I love it, and I think my artwork looks so much better! Best of all, my husband loves it as well!
I will write a post this week on how I achieved this chippy look. Thanks for visiting, and check out all the other great makeovers on Metamorphosis Mondays at Between Naps on the Porch!